Yes, professional painters always prep walls before painting because surface preparation is the key step that makes paint stick well and last longer. They clean, fill holes, sand rough spots, and apply primer to create a smooth surface for topcoat application. Skipping prep leads to peeling, uneven color, and poor durability, which is why pros spend more time prepping than painting.
This guide covers everything professional painters do to prep walls, why each step matters, and how proper preparation creates paint jobs that last for years.
What Is Wall Preparation in Professional Painting?
Wall preparation includes all work done to make surfaces ready for paint. Professional painters follow specific steps to clean, repair, sand, and prime walls before applying the first coat of paint.
Professional painters know that proper preparation is key to a successful paint job. The preparation process involves several critical steps that amateur painters often skip.
The 7 main steps professional painters use:
- Clean all wall surfaces
- Remove old paint that is peeling
- Fill holes and cracks
- Sand rough areas smooth
- Apply primer to bare spots
- Tape off trim and fixtures
- Cover floors and furniture
Each step serves a specific purpose. Skipping any step can cause paint to peel, crack, or look uneven within months.
Why Do Professional Painters Always Prep Walls?
Professional painters prep walls because unprepared surfaces cause paint to fail. Clean well prepped surfaces allow for the paint to adhere while allowing for a smooth and clean area to paint on.
Paint fails on unprepared walls in these ways:
- Paint peels off dirty or greasy surfaces
- Paint looks patchy over holes and cracks
- Paint cannot stick to glossy surfaces
- Paint bubbles when applied over moisture
Paint cracking on walls and ceilings happens due to a variety of causes, one of the most common being poor preparation of a surface prior to painting.
Professional painters understand that fixing paint problems later costs three times more than doing proper prep work from the start.
How Do Professional Painters Clean Walls?
Professional painters clean walls with mild detergent and warm water or light sanding. Professional painters hate washing walls because washing takes time, so many pros use light sanding instead.
Two methods professional painters use to clean walls:
Method 1: Washing Walls
Professional painters wash walls in these situations:
- Kitchen walls with grease buildup
- Bathroom walls with soap scum
- Walls with cigarette smoke residue
- Walls with crayon marks or stains
For surfaces that have exposure to oil or grime, like kitchen walls, wash with a solution of water and grease-cutting detergent and follow up with clean water to remove any residual cleaning agent.
Method 2: Light Sanding
Most professional painters lightly sand or “scuff” the walls with a pole sander using fine-grit sandpaper. This method:
- Removes dirt and grime faster than washing
- Creates better paint adhesion
- Removes shine from previous paint
- Works on most wall surfaces
Professional painters use 100-grit to 150-grit sandpaper for wall scuffing.
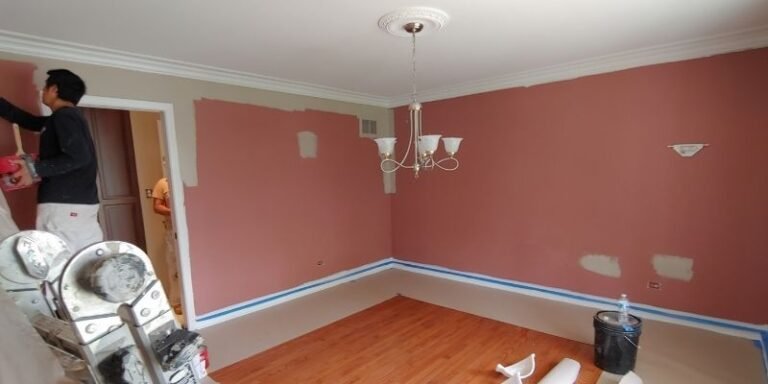
What Holes and Cracks Do Professional Painters Fix?
Professional painters fill all visible holes and cracks before painting. Even small nail holes show through new paint and make walls look unfinished.
Common wall damage professional painters repair:
- Nail holes from pictures and mirrors
- Screw holes from wall anchors
- Small dents from furniture bumps
- Hairline cracks around windows and doors
- Larger cracks from house settling
Professional painters will inspect them for any damage such as cracks, holes, or areas of peeling paint. Any damage will be repaired using spackling compound or joint compound, and sanded smooth.
Professional painters use different materials for different repairs:
- Spackling paste for small holes under 1 inch
- Joint compound for larger holes and cracks
- Mesh tape and compound for cracks over 6 inches long
After filling holes, professional painters sand the repairs smooth and apply primer to prevent “flashing” (dull spots) in the final paint.
Do Professional Painters Sand Walls Before Painting?
Yes, professional painters sand walls when needed for paint adhesion. While sanding is not required for every paint project, rough spots on walls, whether they have been previously painted or not, need to be sanded before they are painted to ensure the paint goes on smoothly.
Professional painters sand walls in these situations:
- Walls painted with gloss or semi-gloss paint
- Walls with texture that needs smoothing
- Areas where they made repairs with filler
- Walls with peeling or flaking paint
Smoothing walls before painting is necessary for surfaces previously painted with a gloss or high-gloss paint. For previously painted water-based paint, sand with a fine-grit sandpaper. For oil-based paint, a medium-grit sandpaper (100- to 150-grit) should be used.
Professional painters always clean dust off walls after sanding because dust prevents paint from sticking properly.
When Do Professional Painters Apply Primer?
Professional painters apply primer to create an even base for paint. Use a primer to get the most out of your paint, especially if your walls are porous or have surface stains that need covering up. Research from Benjamin Moore shows that primers disguise imperfections, create a smooth surface for paint adhesion, and prevent issues like paint blistering on damp surfaces.
Professional painters use primer in these situations:
- Over bare drywall or wood
- When changing from dark to light colors
- Over stains that could bleed through paint
- On repaired areas to prevent flashing
- On glossy surfaces for better adhesion
Three types of primer professional painters use:
- Water-based primer for most interior walls
- Oil-based primer for wood and metal surfaces
- Stain-blocking primer for water stains, crayon marks, and smoke damage
Primers disguise imperfections, create a smooth surface for your paint to lock onto, and ensure a uniform finish no matter what you’re painting.
How Do Professional Painters Handle Different Wall Types?
Professional painters adjust their prep methods based on wall material and condition. Different surfaces need different preparation steps.
New Drywall
- Sand joint compound smooth
- Prime entire surface with drywall primer
- Look for nail pops and bumps
Previously Painted Walls
- Test for lead paint in homes built before 1978
- Sand glossy paint for adhesion
- Scrape off loose or peeling paint
Textured Walls
- Clean dust from texture grooves
- Use thick-nap rollers for even coverage
- Fill only major gouges and holes
Plaster Walls
- Test for loose or crumbling plaster
- Prime with alkyd primer for better adhesion
- Repair cracks with mesh tape and compound
What Tools Do Professional Painters Use for Wall Prep?
Professional painters use specialized tools that make prep work faster and better. These tools help create smooth, clean surfaces ready for paint.
Essential prep tools professional painters use:
- Pole sanders with fine-grit sandpaper for wall scuffing
- Putty knives in multiple sizes for filling holes
- Scrapers for removing loose paint
- Vacuum with brush attachment for cleaning dust
- Drop cloths to protect floors and furniture
- High-quality painter’s tape for clean lines
Professional painters invest in good tools because they save time and create better results on every job.
How Long Does Professional Wall Prep Take?
Professional wall prep typically takes 1-2 days for an average room. The time depends on wall condition and the amount of repairs needed.
Time breakdown for professional wall prep:
- Cleaning walls: 2-4 hours per room
- Filling holes and cracks: 1-3 hours per room
- Sanding repairs: 1-2 hours per room
- Priming: 2-4 hours per room
- Taping and covering: 1-2 hours per room
Prepping the walls often takes just as long as painting them, but it is a vital step in the process if you want your walls to look great.
Professional painters know that rushing prep work leads to paint problems and unhappy customers.
What Mistakes Do Amateur Painters Make During Prep?
Amateur painters often skip important prep steps that professional painters always do. These mistakes cause paint to fail within months instead of lasting for years.
5 common prep mistakes amateurs make:
- Not cleaning walls before painting – Dirt and grease prevent paint adhesion
- Skipping primer on repairs – Causes dull spots in the final paint
- Using cheap painter’s tape – Leaves sticky residue and bleeds
- Not sanding glossy surfaces – New paint cannot stick properly
- Rushing the drying process – Wet surfaces cause paint to bubble and peel
Professional painters avoid these mistakes through experience and following proven processes on every job.
How Much Does Professional Wall Prep Cost?
Professional wall prep costs $1-3 per square foot depending on wall condition. This includes cleaning, repairs, sanding, and priming before painting begins.
Factors that affect prep costs:
- Wall condition – Damaged walls need more repair work
- Room size – Larger rooms cost more but have lower per-square-foot rates
- Paint removal – Scraping old paint adds time and cost
- Stain blocking – Special primers cost more than standard primers
Most professional painters include basic prep in their painting quotes. Major repairs or extensive prep work may cost extra.
Do Professional Painters Remove Wallpaper?
Most professional painters remove wallpaper before painting for best results. According to Sherwin-Williams surface preparation guidelines, painting over wallpaper is not recommended, especially if you have wallpaper with a high sheen or heavy texture, because even premium paint cannot hide wallpaper seams.
Why professional painters remove wallpaper:
- Paint cannot hide wallpaper seams
- Wallpaper can bubble under new paint
- Textured wallpaper shows through paint
- Wallpaper adhesive prevents paint adhesion
Professional painters use steamers and scrapers to remove wallpaper completely, then sand and prime the walls before painting.
How Do Professional Painters Protect Your Home?
Professional painters protect floors, furniture, and fixtures during prep work. This protection prevents damage and makes cleanup easier.
Protection methods professional painters use:
- Canvas drop cloths on floors (not plastic that gets slippery)
- Plastic sheeting over furniture and fixtures
- High-quality painter’s tape on trim and windows
- Rosin paper on stairs and walkways
Canvas absorbs drips and prevents slips, and it’s durable enough to last a lifetime of paint projects.
Professional painters also remove outlet covers, light switch plates, and cabinet hardware to paint behind them properly.
What Questions Should You Ask Professional Painters About Prep?
Ask specific questions about wall prep when hiring professional painters. Their answers tell you if they do thorough preparation work.
Important questions to ask:
- Do you clean walls before painting?
- How do you handle holes and cracks?
- What type of primer do you use?
- Do you sand glossy surfaces?
- How do you protect my floors and furniture?
- Is prep work included in your quote?
Professional painters will explain their prep process in detail. Painters who give vague answers or seem to rush prep work may not deliver quality results.
Signs Your Walls Need Professional Prep
Some wall conditions require professional prep skills and tools. Attempting complex prep work yourself can damage walls and waste money. The Environmental Protection Agency requires special certification for disturbing lead paint in homes built before 1978, making professional preparation essential for older homes.
When to hire professional painters for prep:
- Lead paint removal in homes built before 1978
- Extensive water damage or stains
- Large cracks that may indicate structural issues
- Multiple layers of old paint that need removal
- Textured walls that need smoothing
Professional painters have the training, tools, and insurance to handle difficult prep work safely.
How Professional Prep Affects Paint Longevity
Proper wall prep can make paint last 7-10 years instead of 2-3 years. When preparing walls for painting, priming surfaces is very important to make your paint job last for years to come.
Benefits of professional wall prep:
- Paint adheres better and resists peeling
- Colors look more vibrant and even
- Stains stay hidden under new paint
- Walls stay cleaner and easier to wash
- Touch-ups blend better with existing paint
Professional preparation creates a strong foundation that helps paint perform as designed by the manufacturer.
Final Thoughts
Professional painters always prep walls before painting because preparation determines how long paint will last and how good it will look. The cleaning, repairing, sanding, and priming steps that professional painters follow create the foundation for beautiful, long-lasting paint jobs.
While wall prep takes time and skill, it makes the difference between paint that fails in months and paint that looks great for years. Professional painters understand that proper preparation is not optional – it is the most important part of any successful painting project.Ready to get your walls professionally prepped and painted? Contact our experienced painting team for a free estimate. We follow proven prep processes on every job to deliver results that last. Check out our interior painting services and see examples of our work in our project gallery.